|
The scenario database editor can be accessed from the <System><Scenario Editor> menu in the main environment when running in <Maintenance Mode>. The editor is not available in the Evaluation Version.The user interface of the editor is shown below.
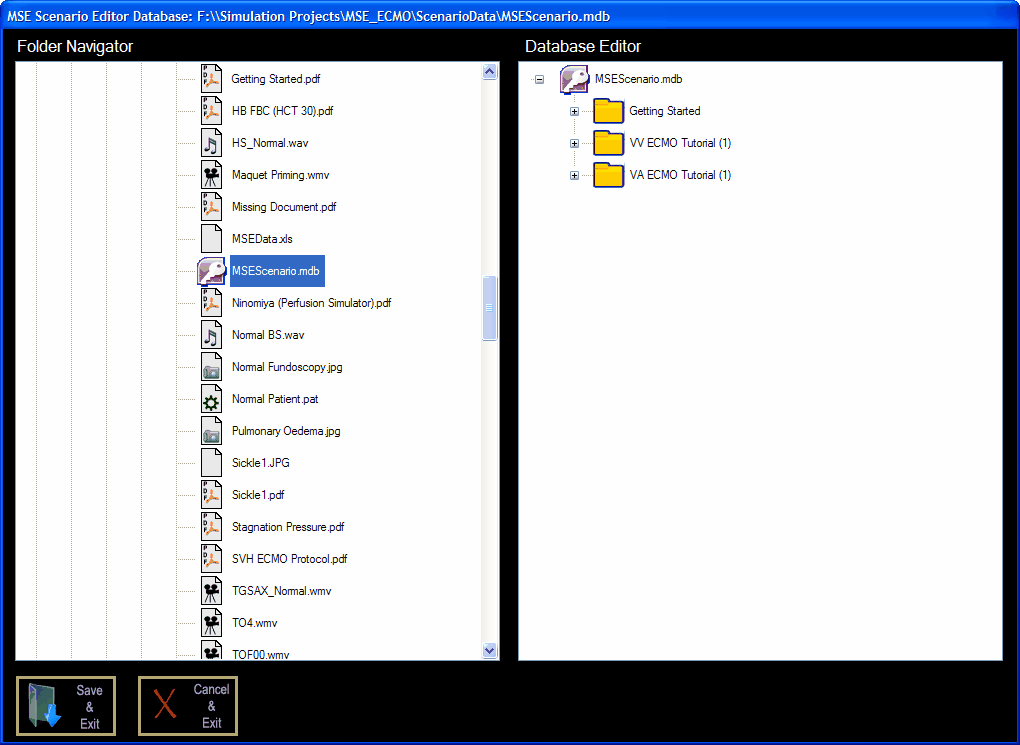
The editor is 'modal' - which is to say that it must be closed with the <Save & Exit> button or <Cancel & Exit> button before any other activities can be undertaken.
In order to navigate the file system you must either click on the folders themselves or on the <+/-> signs at the left-hand side of the folders.
Adding a new scenario:
We'll now work through adding a complete new scenario to the database in order to illustrate the use of the editor. To do this:
| • | Create all the files which are required for the scenario and place them in the 'ScenarioData' folder (refer to the section entitled 'Scenarios - Creating Resources' for a description of the technique). |
| • | Start the system in <Maintenance Mode>. |
| • | Click <System> <Scenario Editor>. |
In the <Folder Navigator> window:
| • | Click on the <+> sign by the side of the drive which contains the application. |
| • | Keep on clicking on the <+> signs until you reach the <ScenarioData> folder and its contents are visible to you. |
| • | Click on the file 'MSEScenario.mdb' to select it. |
| • | Right mouse button click this file to open it in the database editor. |
The database should now appear in the <Database Editor> window (as in the figure above.). In the <Database Editor> window:
| • | Click on the 'MSEScenario.mdb' folder. An <Add a new scenario?> dialog box will appear. |
| • | In the <Scenario Title> field enter something like 'Test'. |
| • | Move the cursor to the <File Name> field. |
| • | Click on a 'pat' file in the left-hand window (eg 'Normal Patient.pat'). This file name should appear in the <File Name> field of the <Add a new scenario?> dialog box. |
At this stage, a new folder names <Test> should appear in the database tree of the right-hand window. You have successfully created a new scenario which contains physiological data, but does not yet include any Clinical Notes, Investigations or Resources.
To add Clinical Notes:
| • | Click on the <+> sign to the left of the <Test> folder. |
| • | Click on the <Clinical Notes> folder itself. An <Add Clinical Notes?> dialog box will appear. |
| • | Move the cursor to the <File Name> field. |
| • | Click on a 'pdf' file in the left-hand window (eg 'Getting Started.pdf'). This file name should appear in the <File Name> field of the <Add Clinical Notes?> dialog box. |
The clinical notes which are contained in the folder 'Getting Started.pdf' should now be visible in the <Clinical Notes> folder.
To add Investigations and Resources, go through a similar process to that described for the addition of 'Clinical Notes'.
Finally, click the <Save & Exit> button to commit the changes to the database and then click <System><Exit> to shut down <Maintenance Mode>.
Start the Main Application in <Unsupervised Mode> and click on <Tools><Load Scenario> and confirm that a new scenario named <Test> is now available.
Adding a new investigation to an existing scenario:
To add a single item (for example a pre-operative 12-lead ECG) to an existing scenario, take the following steps:
| • | Make an electronic copy of the 12-lead ECG that you wish to include. The copy must be in 'jpg' or 'pdf' format and should have a width of <= 800 pixels and a height of <= 1000 pixels. |
| • | Place a copy of the file in the 'ScenarioData' folder. |
| • | Start the system in <Maintenance Mode>. |
| • | Click <System> <Scenario Editor>. |
| • | Navigate to the 'ScenarioData' folder in the <Folder Navigator> window. |
| • | Click on the file 'MSEScenario.mdb' to select it. |
| • | Right mouse button click this file to open it in the database editor. |
In the right-hand <Database Editor> window:
| • | Navigate to the scenario in which the addition is to be made. |
| • | Click on the <+> sign to expand the scenario. |
| • | Click on the <Investigations> folder itself. |
| • | An <Add an Investigation> dialog window should now appear. |
| • | Select the item which you want to add as an investigation from the <Folder Navigator> window. |
| • | This item should appear as the <File Name> in the dialog window. |
| • | Add a short description of the investigation in the <Investigation Title> field (eg Preoperative ECG). |
|